Note: This article was originally published in 2005.
Most metalcasters use a crucible made out of some kind of ferrous metal, either steel or cast iron. Because of their iron content, these crucibles are prone to oxidation when placed in a direct air blast like that of a furnace. They scale away to nothing, slowly contaminating your melts, and eventually failing all at once. The solution is to use a ceramic crucible, which does not oxidize or scale. These are available in the form of commercial silicon carbide or clay graphite crucibles, but they can be expensive.
My goal was to see if a backyard caster with access to a ceramics studio through a community center or night school could make his own ceramic crucible.
Making the Crucible
I decided to make my crucible on the potters wheel, partly because it would make it symmetrical and easy to pour, but mostly because I need the practice. I decided to use cone 5 stoneware clay. This means the clay is fired at 2100 degrees in an electric kiln for 7 hours, then allowed to cool overnight. If you try to duplicate this, it’s important to use a high fire clay, or you risk your pot melting when you heat it in the furnace.
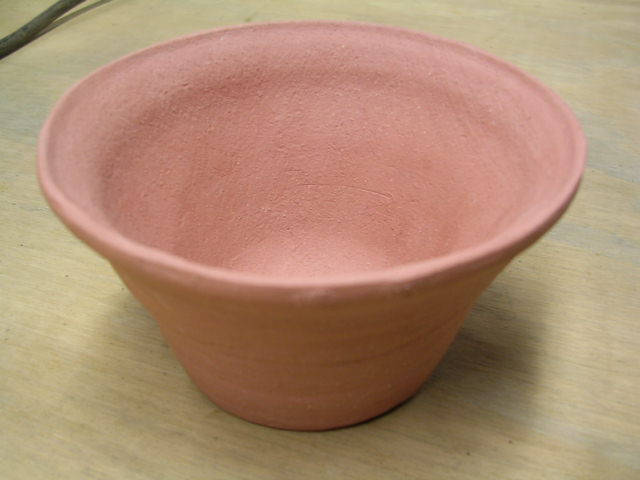
I threw my crucible, and finished the sides and bottom. I did not glaze it. It was fired and returned to me. Here’s what it looked like:
The Melt
After asking the guys at backyardmetalcasting.com, I ascertained that thermal shock would be my biggest problem. If I tried to heat the crucible too fast, it might shatter, spilling molten aluminum all over my feet. To avoid this, I elected to heat the crucible slowly. I started by placing it in my homemade kiln at 200 degrees for a few hours. I then transfered it to my furnace, which I ran with the lid off for a while longer. Once I was satisfied that the crucible was hot, I placed the lid on the furnace and cranked up the burner.
In 4 minutes, the aluminum in the crucible began to melt. I added more, and tended the furnace. Once the crucible was full, I poured it just like normal.
Results
Once the smoke cleared and the dust settled, I was left with one ingot and an undamaged crucible. There was no evidence of cracking, and no oxidation or scale. There was also very little slag, and the slag that did remain in the crucible simply fell out when I turned it upside down. Here’s the crucible right after the pour, with the slag still in it:
And the ingot:
Conclusions
The clay held up very well. It showed no signs of weakening, and was not all all mushy during the pour. There was no scale or oxidation at all, so this crucible could be used with a powerful air blast in a charcoal furnace. I have no idea how it would stand up to brass melting temps, but alum seemed to present no problems at all. If you have access to a ceramics shop, I would encourage you to try this out. A lot of community art centers and night school offer ceramics courses. The crucible was easy to make, and it was nearly free. My next plan is to make a large crucible, and see how it holds up.


